The new Google Forms makes classroom activities more efficient and more attractive. Here are 9 ways you can use Google Forms.
For years, educators have been using Google Forms to gather data, assess learning and create fun techy learning experiences.
Recently, Google Forms got a facelift, and even more recently, it added some new features. These features make some new things possible in the classroom, and they make some things easier — and prettier — than before.
Here are some of the changes and what you can do with them in class. If you’ve used Google Forms before, please keep your favorite uses of Forms in mind and add them as a comment at the end of the post!
The new Google Forms makes viewing submissions easier than ever. (Click for full-size image.)
1. Hustle through student responses to quizzes, assignments and surveys. Responses in Google Forms are much easier to review now. Before, you could view them in a spreadsheet or see a brief summary of them. Now they’re all gathered right in the form editor under the “responses” tab. You can now view a summary of answers (all in one place … nice!) OR click through each individual response.
You can still view results in spreadsheet view. However, as I learned on Twitter from Google guruAlice Keeler, Forms won’t automatically create a spreadsheet for you like it did. You’ll have to click the little green spreadsheet icon to create one now.
2. Get an email when students submit forms. Before, to see whether there were new submissions to a form, you had to go into the form (or the spreadsheet of results) and check. Now, you can opt to have Forms email you with new submissions.
This is GREAT for infrequently-used forms, and it’s GREAT to turn on after most of your student submissions have come in. I would NOT turn it on right before giving a quiz or test in Forms. Your inbox will be flooded!
CLASSROOM USE IDEA: Create a “late work submission” form. Since Google Classroom (and other assignment collection options) won’t notify you when late work comes in, a form for that (with email notifications on) would notify you! It’s great for absent students, too.
3. Use add-ons and scripts. This was possible with the old Google Forms, but it was just added with new Google Forms. Add-ons and scripts let you add new functions to your Google Forms for your specific needs. They’re available by clicking the three dots in the top right and clicking “Get add-ons …” or “Script editor …”.
Unless you write code or have some to copy into a form, you probably won’t use the script editor.
ANYONE can use add-ons, though, and there are a few that are really useful in education. I’ll show you one here and one later.
A graph added with the g(Math) add-on.
CLASSROOM USE IDEA: Add math equations to Google Forms with the g(Math) add-on.
Click the three dots in the top right and choose, “Get add-ons …”.
Find the g(Math) add-on by searching or clicking on its icon.
Click the “free” button and install it.
Click the puzzle piece icon in the top right and choose “g(Math) for Forms”.
Choose which type of entry you want. (At first, if you’re not sure, experiment. If you don’t like what you create, you can always delete it!)
Add all the details you need. It will add an image to your question!
4. Make sharp-looking forms with templates and themes. If you’re not exactly sure how you want to make a form, there might be one already created for you. Forms has a library of templates you can choose from as soon as you load it up.
PRO TIP: Type “forms.google.com” in your browser to get to forms quickly. (In the past, you had to go to Drive and click “New” and “Google Forms.”)
Forms offers several templates that do a lot of the work for you. (Click to see full-size.)
Some of the templates available:
Contact information (users submit their name, address, email, etc.)
T-shirt sign up (users give their name, t-shirt size, etc.)
Exit ticket (students say what they learned, whether they were prepared, and what would have made the lesson more effective)
Assessment (students fill in their name/email and answer quiz questions that you add)
Worksheet (students fill in their name/email and answer questions that you add)
Course evaluation (students fill in class name and instructor and rate the course in various areas … this one is a good example of how a multiple choice grid works!)
Once you choose a template, you can customize it however you’d like (i.e. add text, images, videos, different kinds of questions, etc.).
Customize your forms by clicking the paint palette in the top right. Choose a color for color scheme or click the photo icon in the bottom right to choose a theme. Themes provide colors and images for forms. You can also upload your own photo to create a theme.
OTHER USES OF FORMS: In a recent reader survey, many people said they wanted to better understand Forms and how it could be used in the classroom. The following ideas were possible in the old Google Forms and are still available in new Google Forms.
5. Create and grade a quiz or test with Flubaroo. Host your quizzes, tests and other assessments digitally with Google Forms. Then, with responses in a spreadsheet, autograde the closed-ended questions (multiple choice, true false, matching) with Flubaroo, an add-on for educators using Google Forms.
Create your quiz in a Google Form (from scratch or using one of the templates). If you want to email results to students later, make sure you make a short-answer question called “Email”.
Click the eye icon in the top right to view the assessment. Fill it in with all the correct answers and use the words “ANSWER KEY” as the name. Submit it with the button at the bottom.
Deliver your quiz to your students:
Use the “send” button to get a link to the assessment that you can give students
Use the “send” button to email a link to students
Add the form to an assignment in Google Classroom
When students have taken the assessment, click the “responses” tab and click the green spreadsheet button to see responses.
Go to that spreadsheet and click “Add-ons > Get add-ons …”. Search for Flubaroo and add it. (If you already have Flubaroo installed, you won’t need this step.
Go to “Add-ons > Flubaroo > Enable Flubaroo for this sheet”.
Go to “Add-ons > Flubaroo > Grade assignment”.
Use the drop-down menus to tell Flubaroo what to do with each question. Click “Continue.”
Choose the answer key you created earlier. (This will be easy if you made the name “ANSWER KEY”!)
Flubaroo will create a grading report for you with student scores and more.
Get more information about Flubaroo and its advanced features at the Flubaroo website.
6. Create a place for you to store quick grades. When students completed simple assignments for me, sometimes I would walk around the room, quickly grade their assignments on the students’ desks and write a grade on them. Instead of collecting those assignments, I wanted a place where I could store those grades to transfer to my gradebook later.
I created a Google Form with all of my students’ names on them. As I walked around the room, I had the form loaded on my iPad. I put each student’s scores into that form. Later, I pulled up the responses and transferred them to the grade book.
7. Create a digital sign-out sheet. Need an easy way to track students as they leave and return to your class? Create a Google Form where they log their name and their destination, as well as whether they’re leaving or returning. In the spreadsheet view, it will time stamp their submission, so they won’t need to write the time. (That way, the return time can’t be fudged to make it look like they weren’t gone as long as they were!)
8. Create a flipped classroom assessment. The flipped classroom comes in many different shapes and sizes, but many teachers have students watch a video and then answer some comprehension questions afterward. This is easily done in Google Forms.
Create a form. Add a YouTube video (click the icon to the right of the form with the triangle “play” button).
Note: You can also add a link to a website, an image, etc. … whatever content you want to deliver to students.
Add questions afterward to gauge their understanding.
Deliver the form to students:
Use the “send” button to get a link to the assessment that you can give students
9. Make a Choose Your Own Adventure activity. By using branching (the “go to section based on answer” choice in the three-dots menu in a multiple-choice question), you can create fun Choose Your Own Adventure Story-type activities. Create them for your students or let students create their own!
Here’s a screencast video tutorial I created a while ago to show you how it works. The basics are still there, although the video shows how to do it with the old Google Forms.
Ever found that perfect YouTube video at home and then couldn't find it the next day at school, well that YouTube account isn't just for posting videos it can also keep track of all those great video resources you want to use in your learning spaces!
YouTube Playlists
Simple start: Login to YouTube using your Google account (setup your YouTube account using your Google account if you've not made one yet) Now then, find that perfect video
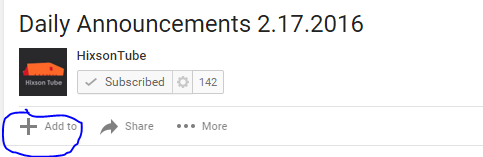
Notice the big plus sign and words
"Add to"
below the video, give it a click
And this menu will pop up
Choose from any one of the pre made lists or choose "Create new playlist"
For this post I will create a new one and give it the title below
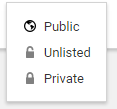
Then choose whether you want the playlist to be:
Public: Anyone can seee this playlist
Unlisted: Anyone with the link to this playlist can see the playlist
Private: Only you (so long as you are logged in) can see the playlist
Once you choose, click create.
Now it's time to navigate back to your channel, you can click the YouTube Icon anywhere to take you back to main, then click on "My Channel"
Once you've landed back at your channel, click on playlists
Voilà, you've created your very own playlists. Create as many as you like, add the same video to multiple playlists and find them with ease stored in the Playlists section of your YouTube Channel
Earlier this week, Google announced a list of new features for Google Forms. Boasting templates that come pre-populated with suggested questions based on your use case and the ability to see who has completed your form and who hasn’t, these new features not only make it easier to create forms, but also provide insight into how your forms are completed.
1) Start From Scratch No Longer
One of the biggest time saving features in this recent rollout are form templates. There are 20 different templates to choose from that are categorized by education, personal, and work. Templates cut out a lot the work you used to spend building and customizing your Google Form. Included in the Template Library are party invites, customer feedback surveys, and even course evaluations for schools. The templates come loaded with photos, questions, and other data specific to your use case. For example, the party invite template includes questions you might sometimes forget to add, such as dietary restrictions or what side dish each guest is bringing.
2) Go Shopping For Add-Ons for Forms
Add-ons and App Scripts are now available in the new Forms editor. Add-ons are great third party tools you can download to help gather more interesting data or integrate with other applications such as Smartsheet. From the top right corner of your Google Form, select the “…” button in the top right corner and then click “Get add-ons.” This menu pictured above will appear where you can peruse and download many different add-ons.
3) Track Survey Progress and Analyze the Results
How useful would it be to be able to see who’s taken your survey and who hasn’t? Now you can track a participant’s progress on a form. There’s even an option to send a reminder to fill out your form to those who haven’t yet responded. Under the Response tab, you can see a summary of all responses, or drill down into individual responses.
4) Receive Notifications and Status Updates
Once you’ve created a form, it is easy to get distracted while you wait for answers to accumulate. Now you can request notification emails to be sent your way each time a participant completes your form. Hello, automation!
From Richard Byrne at Free Technology for Teachers:
This evening I gave a short webinar presentation on my five favorite Google tools for social studies teachers and students. The webinar was hosted by the New England ISTE group. The content of key elements of the webinar are outlined below. Besides what you see featured below we also looked at Google's Ngram Viewer.
1. Google Maps & Earth. In addition to zooming and panning across places in a way that a paper map could never replicate, Google Maps and Google Earth provide great tools for illustrating stories in a geographic context. The videos below demonstrate how to use Google Maps and Google Earth Tour Builder.
2. The Google News Paper Archive can be a great place for students to find old news articles about the topics they're studying in your classroom. Watch the video below to learn how to use it.
3. Google Books provides students with access to hundreds of thousands of books and periodical articles that are in the public domain. I like to create bookshelves within Google Books to help my students get started accessing some of the titles that will be useful to them.
4. Google Scholar is a research tool that is often overlooked by students. Google Scholar provides students with access to court opinions, patents, and peer-reviewed scholarly works. See the features of Google Scholar in my video embedded below.
5. Timeline JS is technically not a Google tool but it does work with Google Sheets. Timeline JS provides a template for creating and publishing multimedia timelines through a Google Spreadsheet.