Wednesday, April 20, 2016

Why Say It When You Can Blabberize It!


Recently, the elementary principal and I developed and facilitated a workshop for several K-4 teachers in our district along with their students interns from Penn State Altoona. The session, entitled The EdTech Game Show, focused on making IT (instructional technology) R.E.A.L. (Relevant, Engaging, Authentic and Lifelong) with 16 digital resources that can be utilized to engage and motivate students in the learning process.

Following the training, first grade teacher Jennell Miller teamed up with middle school teachers Brandon Hescox and Tom Partner to create a cross-curricular project combing science, writing, art and technology.

After drawing a picture of an insect, the first graders researched their assigned “nature’s helper” with an eighth grade buddy to write a mini-report. The pairs then accessed the Blabberize web tool to create a talking animation using original illustrations and facts learned from the research.

Check out our students in action…


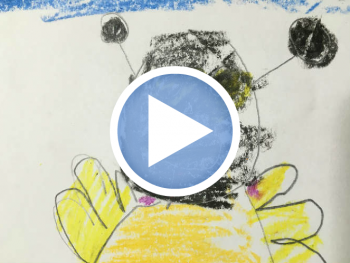
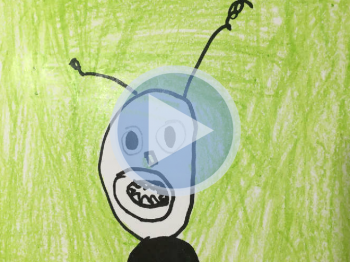
Check out a few examples of the finished projects shown below. As you will see, they are quite impressive! Just click on the image to watch a sample video…

The Honey Bee by Bryson & Troy


The Ant by Bradyn & John


Click here to view additional projects from this collaborate effort.

A high five to my colleagues for making technology “real” for our students. You rock!

Classroom Connection:

A free web tool such as Blabberize provides teachers with the opportunity to foster student creativity, collaboration, speaking and listening skills and engagement with the use of technology. In addition to honing a number of skills, Blabberize offers an interesting and fun way to break up the usual lesson plan!

“Blabbers” can be generated for all types of content area activities. Some topics include historical figures, vocabulary, book talks, reports, character analysis and many more!

I love the fact that original student photos and/or artwork can be incorporated into projects. And your students will too!

Chrome Hacks: Mind-Blowing Tips and Tricks

From Kelly Fitzgerald the EdTech Nut:


I love Chrome. I refuse to use any other browser, unless I am forced to and even then I am kicking and screaming. 


Here are my favorite Chrome Hacks. Please share these tips with fellow educators and students. They will love you for it. 


Tuesday, April 19, 2016

EPIC Review Olympics (Free Templates)

End the school year with Epic Review Olympics (free templates!)

The end of the school year is high time for review. Make your experience EPIC with the review to end all reviews!
As the school year starts to come to a close, a couple of things are certain.
Student motivation will be soaring high. (Not!)
Reviewing previous content get more and more important.
There are lots of ways to make review engaging, but my students have always responded to review games. They get the competitive juices flowing, and they put a new premium on knowing your stuff inside and out.
With the Olympics coming this summer, I’m reminded of a review game that created excitement in my classroom — in Olympic proportions!
In my classes, we called it the Spanish Class Olympics.
When the end of the year comes around, I love using review games. My students love them, partly because they need a little extra incentive to study.
I figured … why not package several days of those days together in one amazing uber competition?
Here were some of the pieces of that epic experience:
(Note: Remember, you don’t have to use the whole experience as it is here! Customize it, add/remove/change games or even use one individual review game all by itself.)
1. Theme music — This really set the tone. Every day, as students walked in the room, I played the NBC theme music for the Olympics: Bugler’s Theme by Leo Arnaud.
2. A leaderboard — Gamification is a hot topic in education right now. When we can bring game elements into learning, it can be very motivating for students. I created one in Google Drawings and updated it every day. We used three teams because the math seemed to work well for the class sizes and the arrangement of the games. The winner of each game got five points; second place got three points; and third place got one point. Any of these suggestions can be modified to fit your class best.
Next, I pulled together some of my students’ favorite review games. Some had a tech component … others were paper-based or used lap dry-erase whiteboards. There’s a good chance you’ve heard of one or more of them … but maybe not! I always love seeing what other teachers do in their classrooms, so this is a peek inside mine. Here are some of my favorites (feel free to substitute your own favorite games):
3. Game: Trashketball — That’s a combination of a trash can and basketball. (I’m from Indiana. Basketball is life.) We set up a trash can at one end of the room. Using pieces of string, we created shooting lines for different point values. We split the class into three teams. Working together, they answered questions. If they answered correctly, they got a point and got to choose a line to shoot from … the farther from the trash can, the more points they were worth. Over time, we added lots of new rules (i.e. lifelines like “step” — take a big step forward before shooting — and “reshoot” — shoot a missed shot again).
4. Game: Row wars — This is a fast-paced small-group game that can get the adrenaline pumping!
  • If I had a class of 18 or more, I divided each team into two smaller teams (in the chart below, Team 1 became Team 1-1 and Team 1-2).
  • If I had a class of 17 or fewer, we just kept the same three teams.
Teams would sit down in columns. Each team needs at least three players, and if there are more than three, they can sit behind the other players on their team and sub in and out during each round (more on that later) …
Row Wars classroom arrangement (1)
I distributed a slip of paper face down to the first person from each team (and they wrote their team number on the back). For each round of the row wars game, I picked five words for students to define. (This game works well for basic recall questions … anything that can be done quickly!)
The slip of paper looked something like this … (except I put the vocabulary words in place of “round 1 word 1”, etc.)
row wars card
When I said “go” …
  • the first person on the team flips the sheet over, looks at the questions, answers one (just one!) and passes it back to the second person on the team
  • the second person answers one (just one!) question and passes it back to the third person
  • third person answers and passes up to second person
  • second person answers and passes up to first person
  • first person answers the final question and puts the slip of paper on a chair or desk in front of their group (the yellow squares in the diagram above)
Here’s how the scoring works:
  • First team done: 6 points. Second team done: 5 points. Third team done: 4 points. (And on and on and on.)
  • Each incorrect answer subtracts a point from the total.
  • You can’t get a negative score.
Tally the scores and add them to the team’s running total. Play as many rounds as you’d like (we usually play six).
When the game is over, determine a winner:
  • With 18 or more students: Add the scores of the both sub-teams together to get the team’s final score. (i.e. If Team 1-1 had 16 points and Team 1-2 had 14 points, add them together for a final Team 1 score of 30.)
  • With 17 or fewer students: The team’s final score is the team’s final score. :)
5. Game: Flyswatters — This is another fun one to practice vocabulary or quick questions. Display a grid of terms on a projector screen (or write them on sticky notes and put them on the board). It looks something like this (fill in your own terms, of course) …
flyswatter grid
You’ll need two flyswatters. I’ve always kept several in my room just in case one is misplaced or if one breaks during an exceptionally lively game. (It has happened!)
Ideally, this is a two-team game, where a student from each team stands on opposite sides of the projector screen. When you call out a definition, the first player to swat the term gets the point. (In Epic Review Olympics, just rotate the teams at the screen … Team 1 vs. Team 2, Team 2 vs. Team 3, Team 3 vs. Team 1 and on and on and on …)
When a team swats the correct term, it gets a point. I will print a sheet of the terms and use it for two things — to cross off terms as I call them AND to tally score for the teams. (If you want to go through the terms twice, put a line through the word the first time and then put an X through it the second time.)
6. Game: Kahoot! — More and more teachers around the United States and the world are getting to know this great tool. Kahoot! (getkahoot.com) lets you turn multiple-choice questions into a game show in the classroom, complete with music, a leaderboard and students ringing in with answers.
You can create Kahoot! games with your own questions OR you can search the millions of games created by teachers, students and others. (Hint: If you find one you like but want to change/remove/add content to it, duplicate it to your account and make whatever changes you want.
When I’ve played this with students, each student has played through independently (not grouped into teams). When the game was over, I would figure out what position the top three finishers were for each team by downloading the final results in a spreadsheet (an option at the end of the game).
Example:
  • Team 1’s three best finishers were 2nd, 4th and 7th
  • Team 2’s three best finishers were 1st, 5th and 6th
  • Team 3’s three best finishers were 3rd, 8th and 9th
  • Add the places for all three teams (Team 1: 2+4+7=13, Team 2: 1+5+6=12, Team 3: 3+8+9=20).
  • The lowest score is first, next lowest is second and highest is third. (In our example, Team 2 is first, Team 1 is second and Team 3 is third.)
If you’re looking for more of a team effort, Kahoot! has a “play by team” option. When you load the Kahoot! game, choose the “team” option and let the group work together from one device per team. This is a great option for classes without one device for each student or, again, for more teamwork.
7. Game: Your ideas — You can play Epic Review Olympics with as many games as you’d like. Feel free to use the four listed above, or remove or add as you’d like!

10 Google Slides Activities to add Awesome to classes


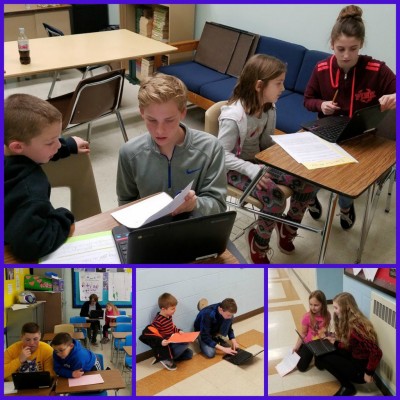
Google Slides lets students collaborate and display ideas effectively. Create animation, story books, video galleries and more. (Flickr / college.library)
At one point, creating a PowerPoint presentation to show to the class was cutting-edge classroom technology.
Those days are gone, and now, online presentations enable so much more for students.
Google Slides, the Google Apps solution to PowerPoint, opens this classroom staple up to vast possibilities. With real-time collaboration, connection to other Google Apps and the ability to embed presentations in websites, students can do so much more than “make a PowerPoint.”
Here are some ideas to harness the Google Slides greatness in your classroom. (Note: “Google Slides” is the name of the app, but “presentations” are what you create in Google Slides.)
1. Shared presentations: This is one of my top five go-to techy classroom techniques. It’s easy, it’s quick and it connects students’ work. Create a Google presentation and then create a slide for every student in the class. Share the presentation with students (with a link or by e-mail … use the blue “Share” button) and assign each student a slide number. Students can use it as a quick “do now” activity, as an exit ticket or other type of formative assessment. They can also use the search when inserting images to find a picture relevant to the topic at hand. When finished, let them scroll through other students’ slides (and add comments!) or display on a projector.
2. Screencast videos: Google Slides is the key that makes for great screencast videos. (Screencast = recording video of your screen with audio from a microphone to create a video presentation.) Use a screencasting tool. I like Snagit for the Chrome browser … install the extension AND the app to make it work. Students can create a presentation in Google Slides and then record themselves presenting it. Snagit uploads the video directly to their Google Drive account, so the video can be shared with a link or embedded on a website.
3. Animation: This is a great hack (i.e. non-traditional use) of Google Slides that could take some time to complete but yield amazing results. Check out this video, where the creators made an impressive animation with 450 slides in a Google Slides presentation just by clicking through the slides quickly.
4. Global shared presentation: The shared presentation in No. 1 doesn’t have to stay in the confines of your classroom. By sharing that presentation by link or e-mail with classes in your city, country or beyond, fun and meaningful interactions can occur in real time. Find a class to share learning (Twitter or Google Plus are great for this … see how I’ve done it on this conference session page). Then start sharing insights together — reports on the weather, photos of surroundings, reactions to content learned in class, etc. When students see someone else making changes to a presentation in real time from another part of the world, it’s a real “It’s a Small World After All” moment!
5. Story books: With Creative Commons photos at their disposal, students can create great story books using Google Slides. Find these images by inserting an image and clicking “Search,” or go directly to search.creativecommons.org to copy and paste images over. (Make sure they’re giving attribution and a link to the original image!) Images can drive the story or vice versa. Students write and create, and when finished, they can share their storybooks or embed them in a class website.
6. Vocab alive: Turn vocabulary lists into an engaging, meaningful learning activity with Slides and images. Using the same tactics for finding photos from No. 5, students can illustrate their vocabulary lists with beautiful Creative Commons images. Connections in the brain with new words are stronger if they’re paired with an image. Those presentations can be displayed for class or saved for personal study.
7. Integrate other Apps in Slides: The various Google Apps can support each other. When creating a presentation in Slides, students can create an image in Google Drawings and copy it into a Google Slides presentation. This also works for charts created in Google Sheets. Add some data to a spreadsheet and create a chart, which can also be copied into a presentation.
8. Virtual tours with Google Earth: Google Earth’s street view is a visually stunning experience, giving users a first-person view of life from the streets of cities around the globe. Google Earth is great for giving virtual tours, but there’s a simpler and faster version of it. Take screenshots of scenes from Google Earth and paste them in a Google Slides presentation. Add a title and/or some text description. With lots of slides, a virtual tour can happen quickly and meaningfully.
Untitled GIF9. Video galleries: Sometimes, a quick video is all it takes to make an idea clear. Students can find useful videos on YouTube (or other video sites) and embed those videos in a presentation to create a collection of visual ideas. YouTube videos are pulled in simply by inserting a video. Other videos can’t be embedded like YouTube videos, but there are options. Make a quick screenshot from a video and link it to a video (on School Tube, Teacher Tube or another site) by clicking the link button in the toolbar.
10. Quick blog: Blogging is a useful reflective activity that can generate a lot of online conversation among students. A quick, simple version of blogging can be created in a Google presentation. Create a shared presentation (see No. 1 above), and have students write a short “blog post” in their slides. They can even add images (see No. 5 above). When complete, students can read each other’s writing and write comments on them using the comment button in the toolbar. Conversations stay grouped together when students reply to each other using the “reply” button. This creates meaningful conversation with very little prep time.

Monday, April 18, 2016

An Interactive Cartogram of News

Richard Byrne at Free Technology for Teachers

Unfiltered News is a new site that uses an interactive cartogram to help you find trending news stories from around the world. To find stories through Unfiltered News simply open the website and click on a topic listed within one of the circles on the map. Once you've made a selection a list of stories will appear on the right side of your screen. Click on a story to read it in full. From the menu on the right side of the screen you can choose a different location and a new list of stories will appear.

Applications for Education
Unfiltered News could be a good resource for social studies classes in which students are learning about current events. Unfiltered News does a nice job of showing visitors which stories are trending where in the world. This could lead to a good discussion with students about why certain topics are trending in one part of the world, but are not trending in another part of the world.

Friday, April 15, 2016

6 Ways Google Hangouts can make any Teacher's life better

Matt Miller:  Ditch That Textbook

Google Hangouts are easy to use and help people and classrooms get connected easily. Some of its features can be game-changing! (Flickr / U.S. Department of Agriculture)
As the calendar year changes over, I’ve thought about my most game-changing technology over the last 365 days.
I’m thinking about the one I’ve picked up that’s made the most difference.
It has to be Google Hangouts, Google’s “video chat but so much more” tool.
Google Hangouts often makes me think of the movie “Back to the Future 2″, where protagonist Marty McFly travels — coincidentally — to the far-off year 2015. One of the greatest innovations in the movie’s vision of the future, to a 9-year-old version of me, was the video phone. Now, the video phone is here — and it has more functions than the movie imagined!
(By the way, if you’re as big a “Back to the Future” trilogy fan as I am, you might like to see this list of what the movie got right and got wrong about 2015.)
Here are some of the top ways that I’ve really used this tool (in my personal and professional life) over the past year:
1. Connecting with other educators: I’ve been amazed at how easy (and how glitch-free) it’s been to start a video call via Google Hangouts with educators in the United States and beyond. For me, all it has taken is finding them on Google Plus or using their Gmail account in the Hangouts tab. Then, click on the video camera button to start a video call. All you need is a camera and a microphone, and many computers and devices already have them built in. It’s been great to connect with teachers in California and Washington D.C. in the last couple weeks, especially because of all the miles between them and me in Indiana!
2. Using Hangouts on Air to broadcast live: Hangouts on Air is the broadcast version of Google Hangouts. It allows users to make their video calls visible to a specified audience (i.e. public, to your circles, to specific people, etc.). I haven’t used the broadcast capabilities of this much yet, but educators could incorporate this in great ways:
  • Broadcast class to students who are away (sick, homebound or on vacation) (OK, the “on vacation” one may not be realistic …)
  • Broadcast one class to another class (two teachers of the same content with different specializations could teach to each other’s classes by showing the instruction live on a Hangout on Air)
  • Broadcast performances or school events (i.e. plays, sports events, competitions, performances, etc.)
  • Broadcast school board meetings
  • Broadcast regular video messages from the principal live
3. Using Hangouts on Air to record video: This has the greatest potential for me so far. Some of the greatest benefits of my Spanish classes come from the conversational Spanish that happens. When students are absent and return to say, “What did I miss?”, I often say, “We did a lot of great practice but there’s nothing concrete you need to make up.”
Now, with a minute or so of set-up time, I can record the day’s class and have a link to it on my class website in a couple more minutes. I set up a Hangout on Air using my class Google account. I set the audience as “my circles” (which is no one because that account has no one in its circles) and start the broadcast. When it’s done, I can immediately go to the YouTube video and copy the URL to paste on my class website. That way, students can see what happened in class and catch up with everything they missed.
I also used Hangouts on Air to record conversations I had with Joe Marquez about using social media in class and with Rebecca Vieyra about using little-known sensors in devices in class.
4. Connecting with other classrooms: After doing video chats with my Spanish classes and English classes in Valencia, Spain, I was excited and wrote a lot about global connections:
There are lots of ways to find other classes and students, and once you’re connected, there’s a lot that can be shared or experienced together. My resources page for the conference session I lead on connecting classrooms globally has several tips and sites to use.
5. Communicating with text using chat: Google Hangouts has a text chat feature that can keep individuals or entire groups connected. In the lead-up to my trip to the Google Teacher Academy in Austin, Texas, all of the participants used a Hangout chat to keep in touch with each other and share information. I’ve also used to to send quick messages to individuals, and it’s great. The mobile app makes connecting through Hangouts as simple as sending a text message.
6. Using the mobile app: To expound on that last idea, the mobile app makes chatting and video calls easy and accessible. It’s available on Android devices and iOS devices.

Thursday, April 14, 2016

Google Cultural Institute from the Teaching, Tech and Twitter Blog


Exploring the Google Cultural Institute: Simple Ways to Bring Virtual Field Trips, Beautiful Art, Historic Images & More To Your Students.

The Google Cultural Institute is full of incredible images including beautiful images of famous artwork and artist. I stumbled upon this resource this morning and was blown away by the endless possibilities of using this in the classroom. There are three Featured Projects; Historic Moments, World Wonders, and Art Projects. I know that I have barely scratched the surface of what this site has to offer but here is a quick overview of each.
Historic Moments

What really took my breath away was exploring the Historic Moments Collections. Here you can "Explore online exhibitions detailing the stories behind significant moments in human history. Each exhibition tells a story using documents, photos, videos and in some cases personal accounts of events." "Historic Moments - Google Cultural Institute." Historic Moments - Google Cultural Institute. N.p., n.d. Web. 10 Apr. 2016.

Powerful images bring history to life, making us FEEL and allow us to be transported back in time as we explore history in a way that goes way beyond just reading about it in a textbook.

Photo published for Civil Rights Photography - Google Cultural Institute

In the short period of time I was exploring I found some amazing resources that will get your students hooked on history.

Studying the Civil War? Check out these Symbols of Battle: Civil War Flags.
Ready to begin a unit Women's Suffrage? Check out Suffragettes: Make More Noise.
Frederick Douglass From Slavery to Freedom: The Journey to New York City tells the story of one of the bravest men in history as he fought to end slavery.
World Wonders


Angkor Wat, Street View. Digital image. N.p., n.d. Web. <https://i.ytimg.com/vi/nWyKgZc78Mo/maxresdefault.jpg>.

In World Wonders you and your students can explore the world the way it is today and in ancient times. Historic images, an embedded map of the location and Google Street view transports your students to historic sites around the globe! So many more to choose from but here is a look at a few that caught my eye.

Take your students to Egypt with a virtual field trip to the Pyramids of Giza!
Transport your students way back in time as they discover the wonder of Stonehenge, Avebury.
Explore the beauty and be awed by the incredible Grand Canyon! Four street views and over 1,000 images make this a fantastic virtual field trip.
Art Project
Diving into Art History? Check out the immense Art Project section. You can search by artist, medium and more! The compare feature allows you to see two images side by side for a comparison. This would be a very useful tool if you are studying specific artist, medium, time period or other attribute. To compare click the compare icon in the lower left hand corner.


Then click on the image you want to compare and finally click on the compare icon in the upper left hand corner next to the + sign to add it.


Repeat with the next image you want to compare.


Share to Google Classroom!

The best part is that that you can share directly to Google Classroom! Just click the Google Classroom icon and choose the class you want to share them with.


Go Mobile

Want to take the Google Cultural Institute with you on the go? Check out the Arts and Culture App available for Android and IOS.


There are so many possibilities for using this amazing resource in the classroom. I would love to hear how others are using it to bring history to life with your students.